

Google Chrome allows users to use the Windows Spellchecker for better integration with the system’s language settings and dictionaries. Enabling the Windows Spellchecker can enhance your spell-checking experience by leveraging the advanced features and languages supported by Windows.
Introduction
The Windows Spellchecker offers several benefits over the built-in Chrome spellchecker, including better support for multiple languages and the use of custom dictionaries. This guide will show you how to enable the Windows Spellchecker in Google Chrome.
Steps to Enable Windows Spellchecker in Google Chrome
Step 01: Open Google Chrome
Launch Google Chrome on your computer.
Step 02: Access Chrome Flags
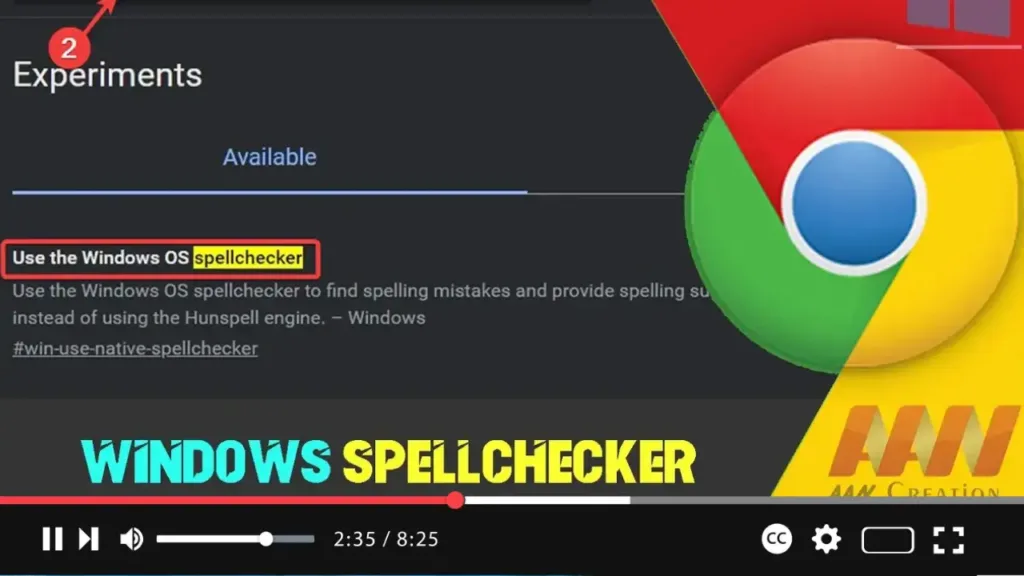
To enable the Windows Spellchecker, you need to access Chrome’s experimental features (flags).
Type chrome://flags/ in the address bar and press Enter.
Step 03: Search for Spellchecker Flag
In the search box at the top of the Flags page, type “Windows Spellchecker.”
Step 04: Enable Windows Spellchecker Flag
Find the flag named “Use the Windows OS spell checker” or “Windows Spellchecker integration” (the exact name may vary depending on your Chrome version).
Click the dropdown menu next to the flag and select “Enabled.”

Step 05: Relaunch Google Chrome
After enabling the flag, click the “Relaunch” button that appears at the bottom of the Chrome Flags page to restart the browser and apply the changes.
Steps to Configure Windows Spellchecker
Step 01: Open Google Chrome Settings
Click on the three vertical dots (menu icon) in the top-right corner of the browser window and select “Settings” from the dropdown menu.
Step 02: Access Languages Settings
Scroll down and click on “Advanced” to expand more settings. Under the “Languages” section, click on “Spell check.”
Step 03: Choose Spellchecker
You will see options for spellchecking. Ensure that “Use the Windows OS spell checker” is selected. If you do not see this option, the flag might not be enabled correctly.
Step 04: Add Languages (Optional)
If you use multiple languages, click on “Languages” under the “Languages” section to add and manage languages. Ensure that the desired languages are enabled for spellchecking.
Additional Information
Custom Dictionaries: With Windows Spellchecker, you can use custom dictionaries that you have set up in Windows. This feature can be particularly useful for specialized vocabulary or personal names.
Multiple Languages: Windows Spellchecker supports multiple languages more effectively, allowing seamless switching between languages based on the text you are typing.
Privacy: Using the Windows Spellchecker ensures that your text is processed locally on your computer, which can be beneficial for privacy concerns compared to cloud-based spell checkers.
Regular Updates: Keep Google Chrome and your Windows operating system updated to ensure you have the latest features and improvements for spellchecking.
By following these steps, you can enable the Windows Spellchecker in Google Chrome, improving your spell-checking experience with better integration and support for multiple languages.

