


Gameloop, formerly known as Tencent Gaming Buddy, has given over 50
million users the ability to run mobile games on their Windows OS. If you’re
reading this, you’ve most likely encountered one of the most intractable
issues that have plagued Gameloop users since its inception, the “failed to
start the emulator” error message. Fortunately, this well-known problem is
not new. It’s been around almost as long as the emulator itself. That being
said, this guide is a compilation of popular methods for dealing with this
mood killer. On this page, we’ll walk you through the best ways to
troubleshoot Gameloop’s failure to launch.
Gameloop” error, ensure that your PC meets the system requirements. It’s
safe to assume you’ve looked into Gameloop’s system requirements. Now, take
a look at the minimum and recommended system requirements listed
below:
Minimum System Requirements to run Gameloop
- Windows 7 or higher (64bit required for all OS options)
- Intel Core i3 560 @ 3.3 GHz or AMD Phenom II X4 945 @ 3.0 GHz
- 3 GB RAM
-
NVIDIA GeForce GTX 460 or AMD Radeon HD 5870 (DirectX-11 compliant with
1GB or VRAM) - DirectX Version 9.0c
- 1GB of free storage
Recommended System Requirements to run Gameloop
- Windows 7 or higher (64bit required for all OS options)
- Intel Core i3 or AMD at 2.6 GHz
- NVIDIA GeForce GTX 660
- 4GB RAM or higher
- DirectX Version 9.0c
think about upgrading the hardware.
error, but they will allow you to begin gaming more quickly:
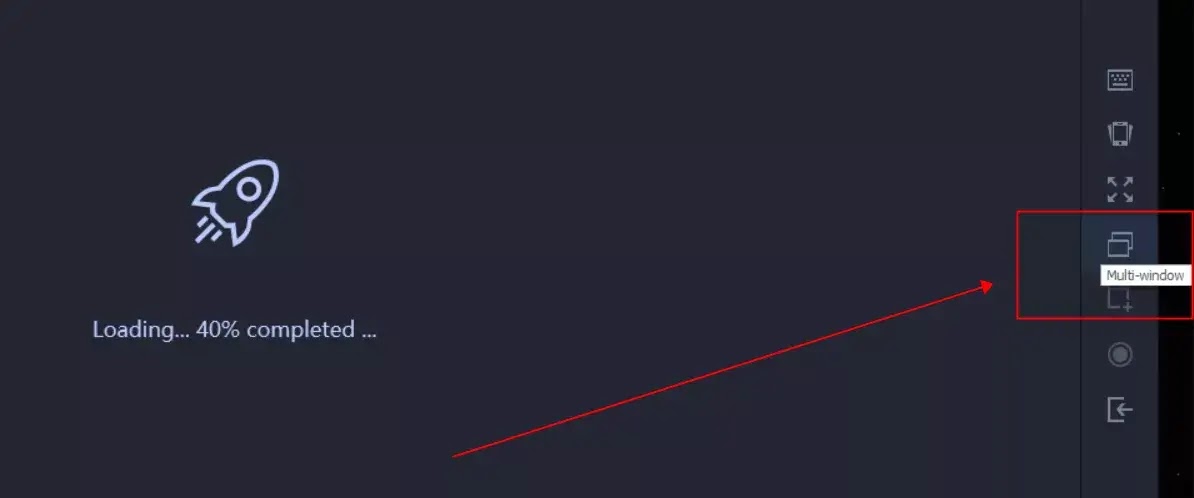
Play Game button. Make certain that Gameloop is not in full-screen mode.
Click the Multi-window icon in the right pane.
(adsbygoogle = window.adsbygoogle || []).push({});
Defender. Your antivirus software may detect Gameloop as a virus and
interfere with it.
Reinstall Gameloop
playing actual AAA games. Your computer most likely isn’t the
issue. If none of the methods above work, you should first try
reinstalling Gameloop by doing the following:
Features.

official.
Use the Best Gameloop Settings
settings to improve performance. If your computer is having
trouble handling the software, check the Gameloop settings by
doing the following:
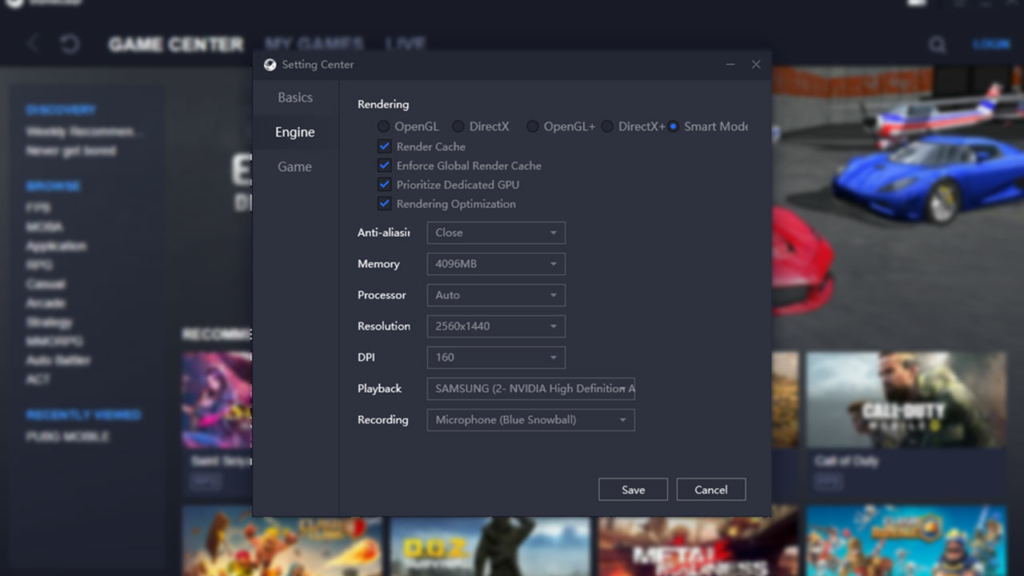
Optimization.
Option to Smooth.
back, and you’ve optimized your Gameloop in-app settings to meet
your requirements. There should be no reason for PUBG not to be
running in Gameloop right now. If the issue persists, you might
have trouble with your DirectX or graphic card.
Confirm DirectX is Properly Installed
an often-overlooked solution to many problems. If you want to
make sure your DirectX isn’t causing any hidden errors,
uninstall it and then do the following:
Microsoft website.
agreement” and “Next.”

installation will begin with a copy of the files to your local
drive.
DirectX11 installation.
Try Process Hacker
the installation process is saved in your memory. That task
is what you will need to find and terminate. Unfortunately,
it’s not as simple as opening your task manager and clicking
“end task” on whatever you want.
download a third-party program called Process Hacker. This
will assist you in removing the lingering process preventing
a proper boot. The steps are as follows:
Process Hacker, then install it.
administrator.

process that is causing the boot to stall).
that process.
able to play PUBG on Gameloop.
Try a Manual Fix
area, where you can use your mouse and keyboard to blast
poor unsuspecting screen rubbers in the side. There are,
however, more advanced approaches to dealing with this
problem.
manual fix suggested by the digit in. The steps are as
follows:
the installation location you selected.
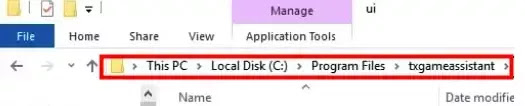
“TxGameAssistant@” and launch the emulator as usual.
start the AOW engine,” or it may be stuck at 1% of the
download process, for example.
more.
mentioned in step 4 and select “Done.”
proceed with caution. We recommend going with the first
option because many sources have confirmed success with it.
However, it is your machine, and you are free to use any
method to fix it.

