

Managing startup apps on Windows 10 is crucial for maintaining optimal system performance. When too many applications are set to run at startup, you may notice that your device takes longer to boot up, battery life may decrease, and overall performance could be sluggish. By controlling which apps are allowed to run at startup, you can significantly improve your system’s efficiency.
Windows 10 provides two primary methods to manage startup apps: using the Task Manager and the Settings app. While Task Manager has traditionally been the go-to tool for this task, the Settings app offers a more user-friendly approach, especially with the addition of a dedicated Startup page.
Why Managing Startup Apps is Important
When you install software on your Windows 10 device, many programs automatically add themselves to the list of startup applications. While some of these apps are essential for your system’s functionality, others are unnecessary and only serve to slow down your startup time. By disabling non-essential startup apps, you can:
- Improve Boot Time: Fewer apps running at startup means your system will boot up faster.
- Enhance Battery Life: Reducing the number of apps running in the background can help conserve battery life on laptops.
- Increase Performance: Fewer background processes mean more system resources are available for other tasks.
How to Disable Startup Apps Using Settings
To configure which apps are allowed to run at startup, follow these steps:
Step 1: Open the Settings App
- Click on the Start button (Windows logo) in the bottom-left corner of your screen.
- Select Settings (gear icon) from the Start menu to open the Windows Settings app.
Step 2: Navigate to the Apps Section
- In the Settings window, click on Apps.
- On the left-hand side, click on Startup. This will open the Startup page, where you’ll see a list of all apps that are configured to run when Windows starts.
.webp)
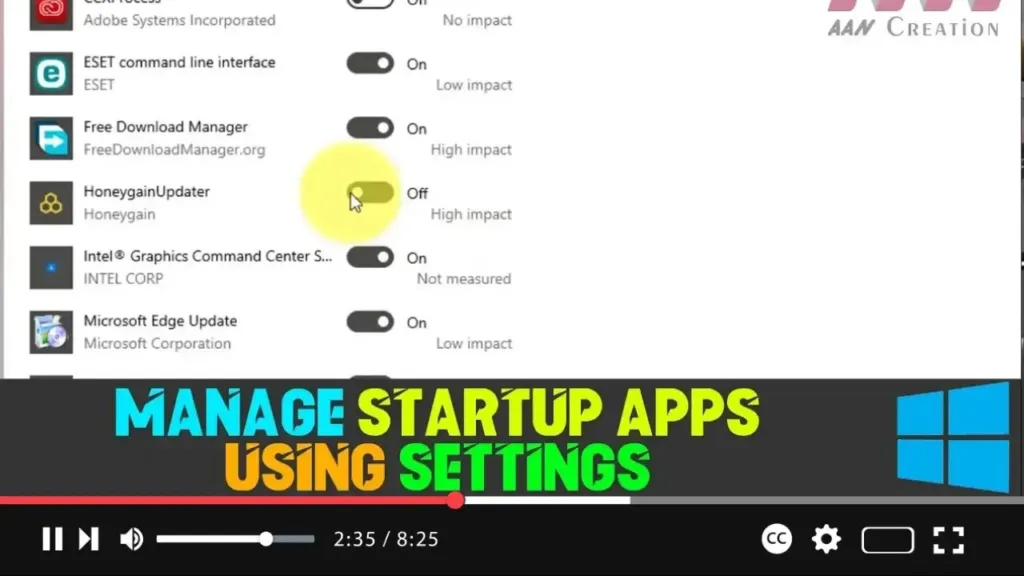
Step 3: Disable Unnecessary Startup Apps
-
Review the list of apps under the Startup section. Each app will have a toggle switch next to it.
-
Turn Off the toggle switch for any apps you do not want to run at startup.
- Impact Information: For each app, you’ll also see an impact label (such as “High impact,” “Medium impact,” or “Low impact”), which indicates how much it affects your startup time. This can help you decide which apps to disable.
Step 4: Confirm Changes
- Once you’ve disabled the unnecessary apps, simply close the Settings window.
- The changes will take effect the next time you restart your computer. The disabled apps will no longer run automatically at startup, improving your system’s boot time and performance.
How to Enable Apps at Startup Using Settings
If you later decide that you want certain apps to run at startup, you can re-enable them easily:
Step 1: Open the Settings App
- Click on the Start button and select Settings.
Step 2: Access the Startup Apps Section
- Go to Apps and then click on Startup.
Step 3: Enable Desired Startup Apps
- Find the app you want to enable and turn On the toggle switch next to it.
Step 4: Apply Changes
- Close the Settings window. The selected apps will now open automatically when you start your computer.
.webp)
Additional Tips for Managing Startup Apps
- Task Manager: If you prefer a more detailed view of startup apps, you can still use Task Manager. Right-click on the taskbar and select Task Manager. Go to the Startup tab to manage apps with additional details such as startup impact, publisher, and file location.
- Clean Up Your System: Regularly reviewing and cleaning up your startup apps can keep your system running smoothly. If you’re unsure about disabling an app, you can always search online or consult the app’s documentation to understand its purpose.
By taking control of which apps run at startup, you can ensure that your Windows 10 device remains fast, responsive, and energy-efficient.

