
When you select an area on your Windows desktop, it is highlighted in
semi-transparent blue. At times, the Desktop is completely transparent, with
a dotted outline around its edges. This article will demonstrate how to
toggle the translucent selection rectangle in Windows 10.
semi-transparent blue. At times, the Desktop is completely transparent, with
a dotted outline around its edges. This article will demonstrate how to
toggle the translucent selection rectangle in Windows 10.
You can show or hide the translucent selection rectangle in Windows 10
using two methods:
using two methods:
01. Performance Options
02. Windows Registry.
To make the necessary changes, you must be logged in as an administrator.
Let us look at the specifics.
Let us look at the specifics.
Method 01: Performance options
01. Open Control Panel and search for and open the ‘System &
Security’ settings.
Security’ settings.
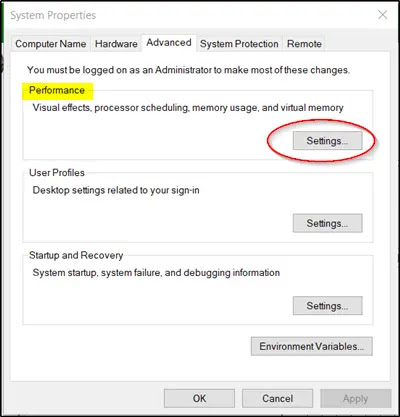
02. Next, click on ‘Systems’ and from the left-side menu, choose
‘Advanced system settings’.
‘Advanced system settings’.
03. Switch to ‘Performance’ section and hit the ‘Settings’ button.
(adsbygoogle = window.adsbygoogle || []).push({});
04. When the ‘Performance’ section window opens, switch to ‘Visual
Effects’ tab.
Effects’ tab.
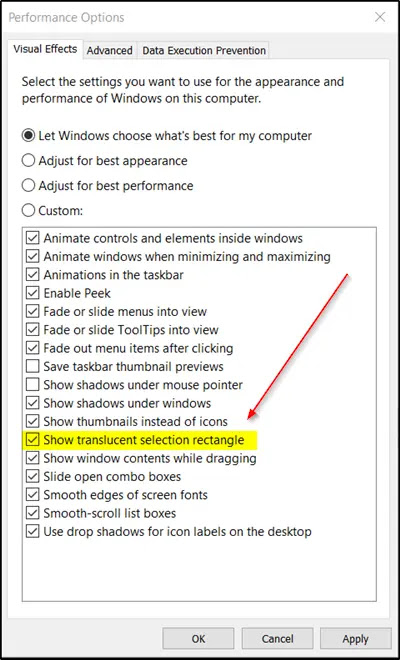
05. Here, select the ‘Custom’ option and check the ‘Show translucent
selection rectangle’ box present beneath ‘the Custom’ option.
selection rectangle’ box present beneath ‘the Custom’ option.
When done, it will let you configure and use this setting for the
appearance and performance of Windows on your computer.
appearance and performance of Windows on your computer.
Method 02: Windows Registry
01. Right Click on the Windows icon and Select Run, type “Regedit”
and press Enter. If UAC prompts you, select Yes to proceed.
and press Enter. If UAC prompts you, select Yes to proceed.
02. Navigate to the following path address-
HKEY_CURRENT_USERSoftwareMicrosoftWindowsCurrentVersionExplorerAdvance
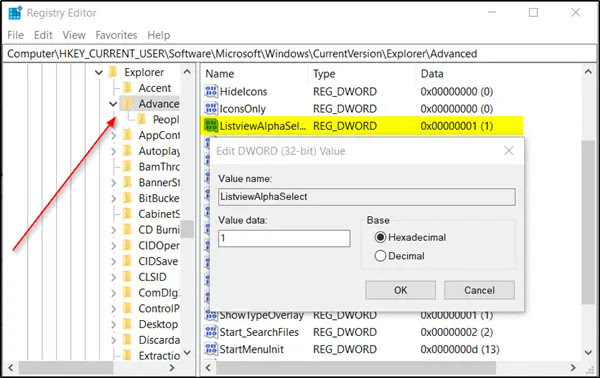
03. Navigate to the right pane and look for the ListviewAlphaSelect
entry.
entry.
04. When you find it, double-click it and enter the following value:
* Set it to 1 to display the Translucent Selection Rectangle.
* Set the Translucent Selection Rectangle to 0 to hide it.
05. Click on OK.
When done, restart your computer.

