


Hibernate mode allows your computer to enter a low-power state, saving all open applications and documents without consuming much power. Unlike Sleep mode, Hibernate saves your session to the hard drive, making it ideal for longer breaks when you don’t want to shut down your PC completely. However, the Hibernate option may not appear in your power menu by default. Here’s how to enable it.
Enabling Hibernate Mode
-
Open Power Options
Click on the Start menu and select Settings. -
Access System Settings
Click on System and then choose Power & sleep from the left sidebar. -
Additional Power Settings
Scroll down and click on Additional power settings under the Related settings section. -
Change Power Button Settings
Select Choose what the power buttons do from the left sidebar. Click on Change settings that are currently unavailable at the top of the window. -
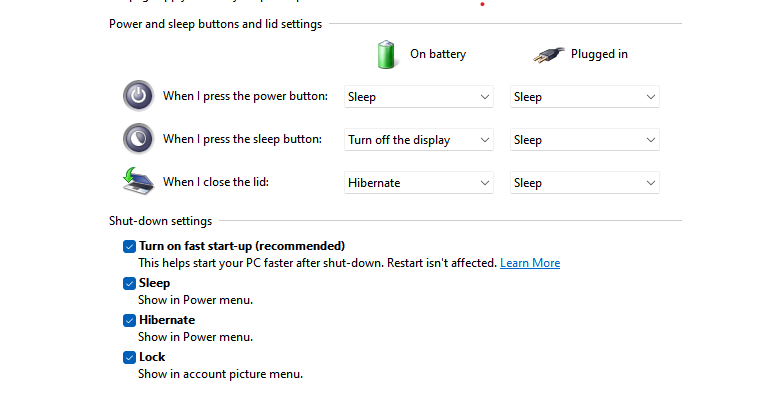
Enable Hibernate Option
Under the Shutdown settings section, find the Hibernate checkbox. Check it if available, then click Save changes.
How to Hibernate Your PC
Once Hibernate is enabled, you can hibernate your PC in several ways:
-
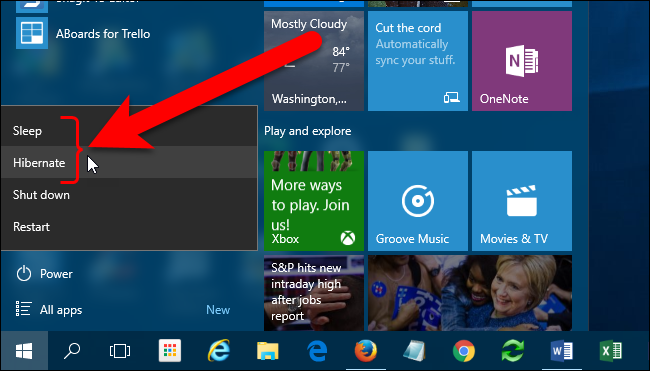
From the Start Menu
Click on the Start button, then select Power, and choose Hibernate. -
Using the Quick Access Menu
Press Windows logo key + X on your keyboard, select Shut down or sign out, and then click on Hibernate.
Important Notes
- If you experience issues with connected devices (like monitors or printers) after waking from Hibernate or Sleep mode, try disconnecting and reconnecting the device or restarting your PC.
- Ensure that all your devices have the latest drivers installed for optimal performance.

