

Reserved Storage could even be a replacement feature meant to line aside an
area of the available storage to use as temporary storage to scale back
problems installing updates.
How to disable ‘Reserved Storage’ on Windows 10
use these steps To disable the Reserved Storage feature to reclaim disk
space, perform a clean installation of the OS, and if this feature
isn’t for you because your device has limited space otherwise you don’t a
bit like the feature, there’s a workaround to disable it modifying the
Registry.
In this guide, you’ll learn the steps to enable or disable Reserved Storage
on Windows 10 version 1903, and you’ll learn the steps to determine what
proportion of space the feature is about aside.
01. Open Start.
02. Search for regedit, right-click the very best result, and choose the Run
as administrator option.
03. Browse the next path:
HKEY_LOCAL_MACHINESOFTWAREMicrosoftWindowsCurrentVersionReserveManager
04. Double-click the ShippedWithReserves key, and alter its value from 1 to
0 to disable/change its value from 0 to 1 to enable.
05. Click the OK button.
Use these steps to check ‘Reserved Storage’ is disabled on Windows 10
If you’d wish to ascertain if Reserved Storage has been disabled after
installing a replacement version of Windows 10, use these steps:

(adsbygoogle = window.adsbygoogle || []).push({});
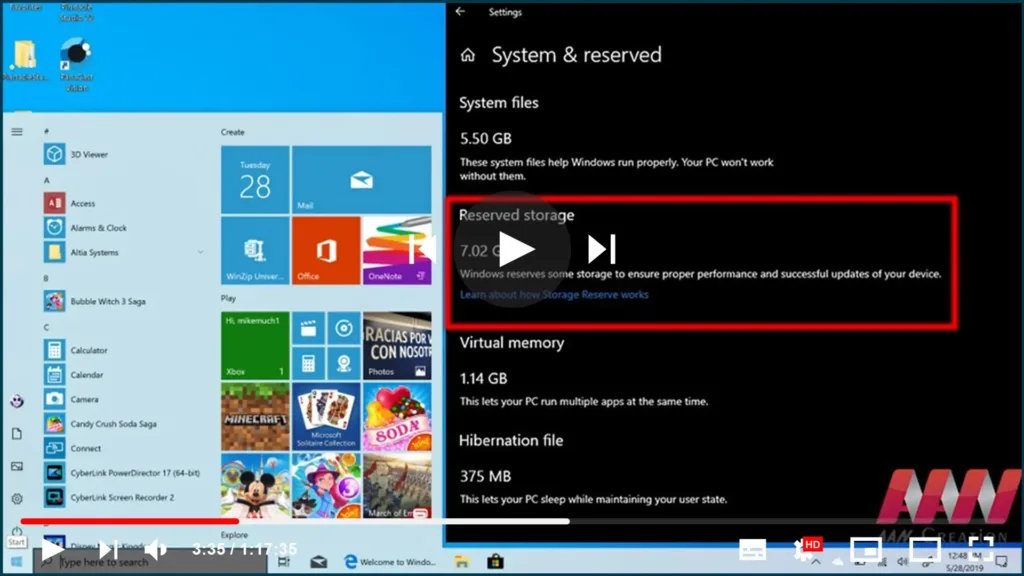
01. Open Settings.
02. Click on System.
03. Click on Storage.
04. Click the Show more categories link.
05. Click the System & reserved item.
06. The “Reserved Storage” section should not be available to point that the feature is disabled.
If we’re still seeing the Reserved Storage section, probably, we didn’t
apply the settings correctly otherwise we have not upgraded to a more modern
version after modifying the Registry.

