

Windows 11 introduces a revamped Snipping Tool app that combines the features of the classic Snipping Tool with Snip & Sketch to capture screenshots. While the default method for accessing the snipping menu is via the Windows key + Shift + S keyboard shortcut, you can customize this behavior to use the traditional Print key (PrtScr, Prt Sc, Print Screen) for quicker access.
In this video tutorial, we’ll guide you through the steps to change the settings in Windows 11 to use only the Print key for taking screenshots with the Snipping Tool:
Step 01: Open Snipping Tool: Start by opening the Snipping Tool app. You can do this by typing “Snipping Tool” into the search bar and selecting the top result.
.webp)
Step 02: Access Settings: Within the Snipping Tool app, click on the menu button (three dots) located in the top-right corner of the window. From the dropdown menu, select the “Settings” option.
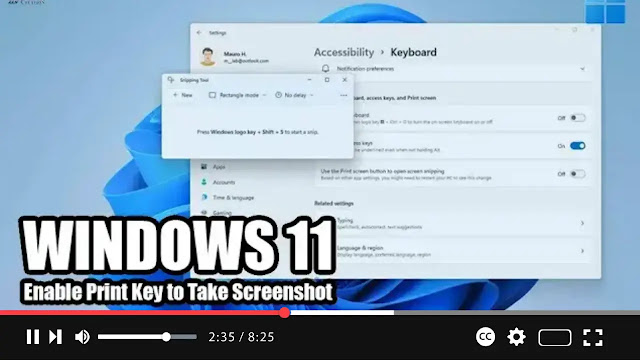
Step 03: Modify Shortcut Settings: In the Settings menu, navigate to the “Shortcut” section. Here, locate the setting for the Print Screen shortcut and click on the “Change in settings” option next to it.
Step 04: Enable Print Key Shortcut: Toggle on the “Use the Print screen button to open screen snipping” option.
.webp)
Once you’ve completed these steps, you can now use the Print Screen button on your keyboard to quickly capture screenshots in Windows 11 using the Snipping Tool. This replaces the need to use the Windows key + Shift + S keyboard shortcut, providing a more familiar and convenient method for taking screenshots.

