

The Start menu in Windows 10 has undergone various transformations over the years. Microsoft has continually refined its design to improve functionality and usability. The latest iteration merges recently added apps, the most-used apps, and live tiles into a single unified interface. However, for some users, the default layout can feel cluttered. Fortunately, Windows 10 offers customization options, including the ability to hide the app list for a more streamlined experience.
In this guide, we’ll walk you through how to show or hide the app list in the Start menu, giving you control over how your apps are displayed.
A Brief Overview of the Windows 10 Start Menu Evolution
With the release of the Windows 10 Anniversary Update, Microsoft introduced changes that consolidated the app list, making it a scrollable interface combining both the “Most Used” and “Recently Added” sections. These changes also relocated the power options to the left sidebar. While the new design was intended to streamline access, not everyone appreciated the new layout. As a result, Microsoft has incorporated more customization options to align the Start menu’s look and feel closer to the Start screen, which is primarily seen in tablet mode.
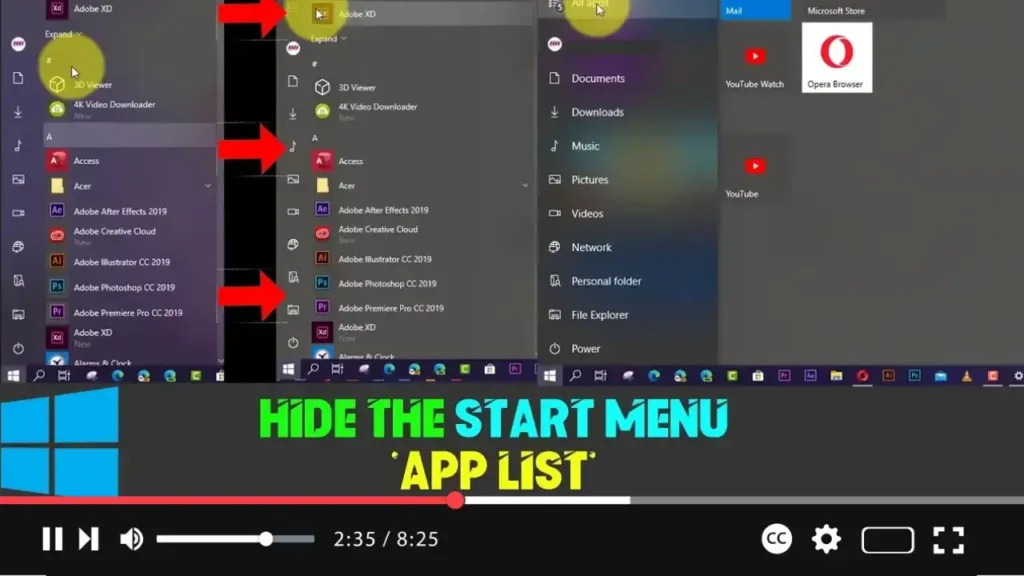
One such feature is the ability to hide the app list entirely, leaving users with a cleaner and simpler interface. When the app list is hidden, users can switch between the pinned tiles view and the app list view with the click of a button.
Steps to Show or Hide the App List in the Windows 10 Start Menu
Step 01: Open the Settings app. You can access this by clicking the Start button and selecting the gear icon, or by pressing Windows + I on your keyboard.
Step 02: Navigate to the Personalization section. This is where all your customization settings are located, including themes, background, and the Start menu options.
.webp)
Step 03: From the left-hand sidebar, click on Start. This will open the settings related to the Start menu, where you can make various adjustments to suit your preferences.
Step 04: Look for the option that says Hide app list in Start menu. Turn off the toggle switch next to this option to hide the app list.
Once you turn this feature on, opening the Start menu will only display your pinned tiles, creating a more focused and minimalist interface. You’ll also notice two new icons in the top-left corner that allow you to toggle between viewing Pinned Tiles and All Apps, mimicking the interface of the Start screen in tablet mode.
Why Customize the Start Menu?
For users who want a more personalized experience, customizing the Start menu can enhance productivity and reduce unnecessary distractions. Some prefer to hide the app list to focus solely on their most-used apps and pinned tiles, while others may enjoy the option to quickly toggle between different sections.
.webp)
By customizing the Start menu to fit your workflow, you can streamline your access to the apps and tools you need most often, ultimately saving time and reducing clutter.
Conclusion
The ability to hide the app list in Windows 10’s Start menu is just one of many ways Microsoft allows users to take control of their desktop experience. By following the steps outlined above, you can tailor your Start menu to better fit your needs, whether that means keeping it clean and minimalistic or having quick access to all your apps. Customizing the interface is a small but significant step toward optimizing how you interact with your PC.
Stay tuned for future updates from Microsoft, as they continue to improve the Start menu and overall Windows experience.

