

Setting up a VPN (Virtual Private Network) connection on your Windows 11 device can enhance your online privacy, security, and freedom while browsing the internet. In this comprehensive guide, we’ll walk you through the step-by-step process of setting up a VPN connection on Windows 11, ensuring a smooth and secure experience.
Step 1: Open Settings
- Click on the Start button located in the taskbar to open the Start menu.
- Select the Settings icon (gear icon) to open the Settings app.
Step 2: Navigate to Network & Internet Settings
- In the Settings window, locate and click on the “Network & internet” option.
Step 3: Access VPN Settings
- On the left sidebar of the Network & internet settings window, find and click on the “VPN” option.
Step 4: Add a VPN Connection
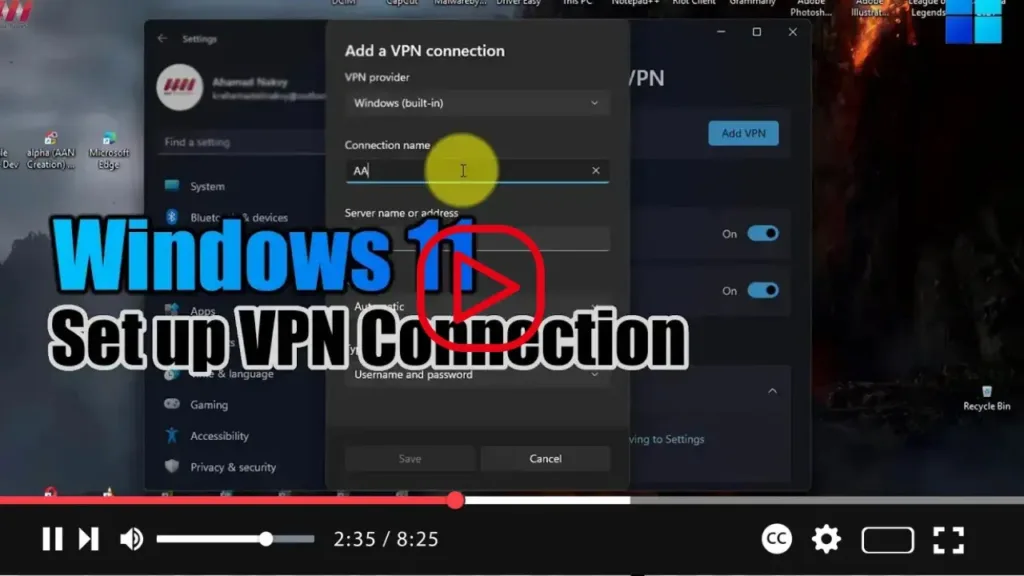
- Under the VPN settings section, click on the “Add a VPN connection” button.
Step 5: Configure VPN Settings
- VPN Provider: Choose your VPN provider from the drop-down menu. If your provider is not listed, select “Windows (built-in).”
- Connection Name: Enter a name for your VPN connection (e.g., MyVPN).
- Server Name or Address: Enter the server address provided by your VPN provider.
- VPN Type: Select the VPN protocol used by your provider (e.g., Automatic, IKEv2, L2TP/IPsec, PPTP).
- Type of Sign-in Info: Choose the type of sign-in information required by your VPN provider (e.g., User name and password, Certificate, Preshared key).
- User Name and Password: Enter your VPN credentials if required.
.webp)
Step 6: Advanced Settings (Optional)
- If your VPN provider requires additional settings, click on the “Advanced options” link to configure them.
Step 7: Save the VPN Connection
- Once you’v.e entered all the required information, click on the “Save” button to save the VPN connection.
Step 8: Connect to the VPN
- After saving the VPN connection, return to the VPN settings page.
- Click on the VPN connection you created.
- Click the “Connect” button to establish the VPN connection.
Step 9: Enter Credentials
- If prompted, enter your VPN username and password, and any other required information.
.webp)
Step 10: Connect
- After entering your credentials, click “Connect” to establish the VPN connection.
- You should see a notification confirming that you’re connected to the VPN.
Conclusion:
Congratulations! You’ve successfully set up a VPN connection on your Windows 11 device. With your VPN connection active, you can now enjoy enhanced privacy, security, and freedom while browsing the internet. Remember to disconnect from the VPN when you’re done using it to ensure that your internet traffic isn’t routed through the VPN unnecessarily.

