

Windows 10 is designed to automatically detect and install drivers when you connect new hardware to your computer. While this is convenient in many cases, there are situations where you might prefer more control over the process. Automatic driver installation may result in a driver version that’s not compatible or one that causes system issues. It’s possible that a newer or older driver version works better for your system, so disabling automatic updates gives you more control over your hardware setup.
Here’s a detailed guide on how to stop Windows 10 from automatically installing drivers.
Why Disable Automatic Driver Installation?
Windows 10 updates drivers automatically through Windows Update, which may not always install the most appropriate driver for your hardware. This could cause instability, performance issues, or even hardware malfunction. By disabling this feature, you can manually install the most suitable driver version from the manufacturer’s website, ensuring better system stability.
Steps to Stop Automatic Driver Installation
Step 01: Right-click the Windows icon located at the bottom-left corner of the taskbar. This opens the Quick Access Menu, providing options to access various system tools and settings.
Step 02: From the menu, select System. This will bring you to the main System Settings page where detailed information about your computer is displayed.
Step 03: On the system page, locate and click on System Info. This opens a more detailed view of your system properties.
Step 04: In the System Info window, look for the Advanced System Settings link in the left pane. Click on it to open the System Properties window.
Step 05: In the System Properties window, switch to the Hardware tab. This tab contains various settings related to the hardware connected to your computer.
Step 06: Click the Device Installation Settings button located in the Hardware tab. This option controls how Windows manages driver updates for your hardware.

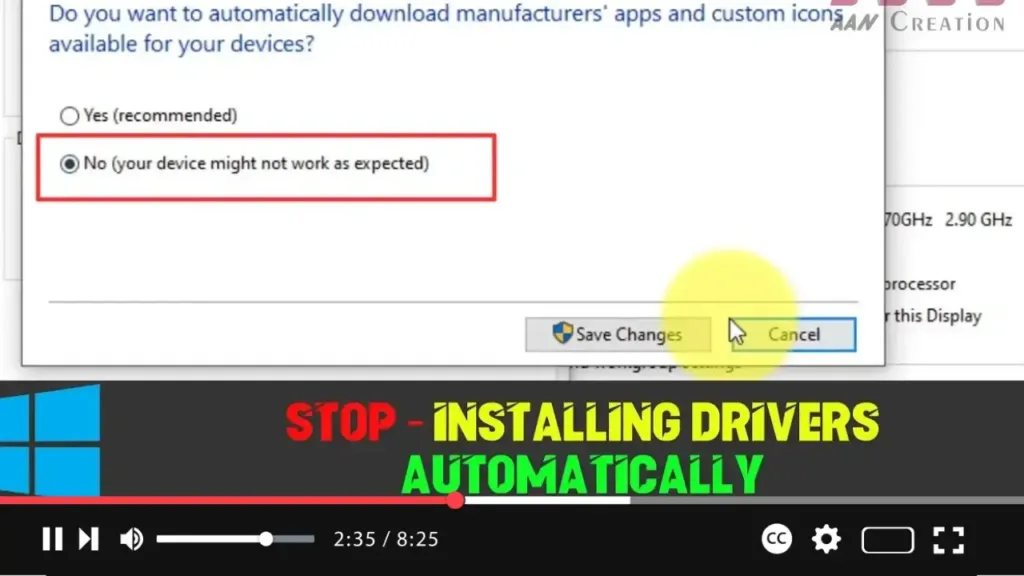
Step 07: In the Device Installation Settings dialog box, select the option that says No (your device might not work as expected). This ensures Windows will not automatically download and install drivers for new devices via Windows Update.
Step 08: Click Save Changes to apply your settings.
Once these steps are complete, Windows 10 will stop automatically installing drivers for new hardware connected to your system. If you want to upgrade or replace drivers manually, you can download them directly from the hardware manufacturer’s website.
Installing Drivers Manually
If you’ve disabled automatic driver updates, you’ll need to manually manage driver installations. This process allows you to install the version that’s best suited for your system. Follow these steps:
-
Visit the manufacturer’s website: For each piece of hardware, head to the official website of the manufacturer. Look for the support or drivers section to download the correct driver for your operating system.
-
Download the correct driver version: Make sure the driver is compatible with your system by selecting the appropriate model and OS version.
-
Install the driver manually: Once downloaded, simply run the installer file, follow the on-screen instructions, and restart your computer if prompted.
This method helps ensure that you have greater control over the stability and functionality of your hardware.
Conclusion
Disabling automatic driver installation in Windows 10 is an effective way to maintain control over the drivers that are installed on your system. This ensures that only the drivers you choose are used, preventing potential issues from poorly optimized or incompatible updates from Windows Update. By following the steps outlined above, you can easily stop automatic driver updates and manually install the drivers that work best for your hardware.

