

Windows Defender DisableAntiSpyware is missing from the Registry.
Enable/disable/Create New, Windows Defender is the default antivirus
solution in Windows 10, just as it was in Windows 8. The program is
enabled by default and will turn itself off if another antivirus solution
is installed, as long as the operating system recognizes it.
Enable/disable/Create New, Windows Defender is the default antivirus
solution in Windows 10, just as it was in Windows 8. The program is
enabled by default and will turn itself off if another antivirus solution
is installed, as long as the operating system recognizes it.
One significant difference between the implementations on Windows 8 and
10 is that you can no longer completely disable Windows Defender using the
application’s preferences.
10 is that you can no longer completely disable Windows Defender using the
application’s preferences.
A click on Settings in Windows Defender brings up the program’s control
panel in the new Windows Settings application. While there are options to
toggle the program’s real-time protection, it is clearly stated on the
page that this is only a temporary state change.
panel in the new Windows Settings application. While there are options to
toggle the program’s real-time protection, it is clearly stated on the
page that this is only a temporary state change.
Create Disableantispyware
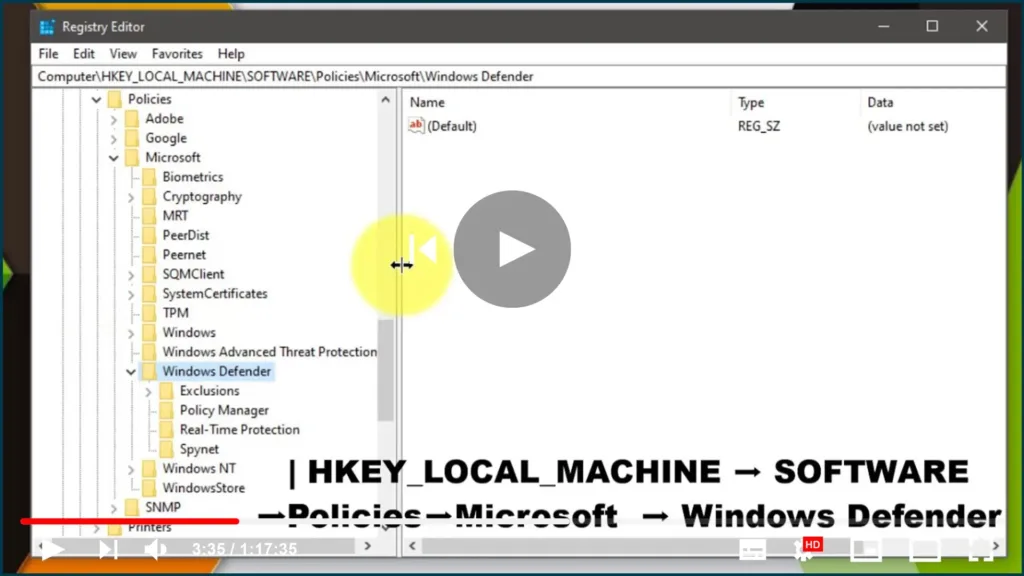
01. Right-Click on Windows ICON ➡ Run ➡ Type “registry”
02. Follow the Patch:
ComputerHKEY_LOCAL_MACHINESOFTWAREPoliciesMicrosoftWindows Defender
(adsbygoogle = window.adsbygoogle || []).push({});
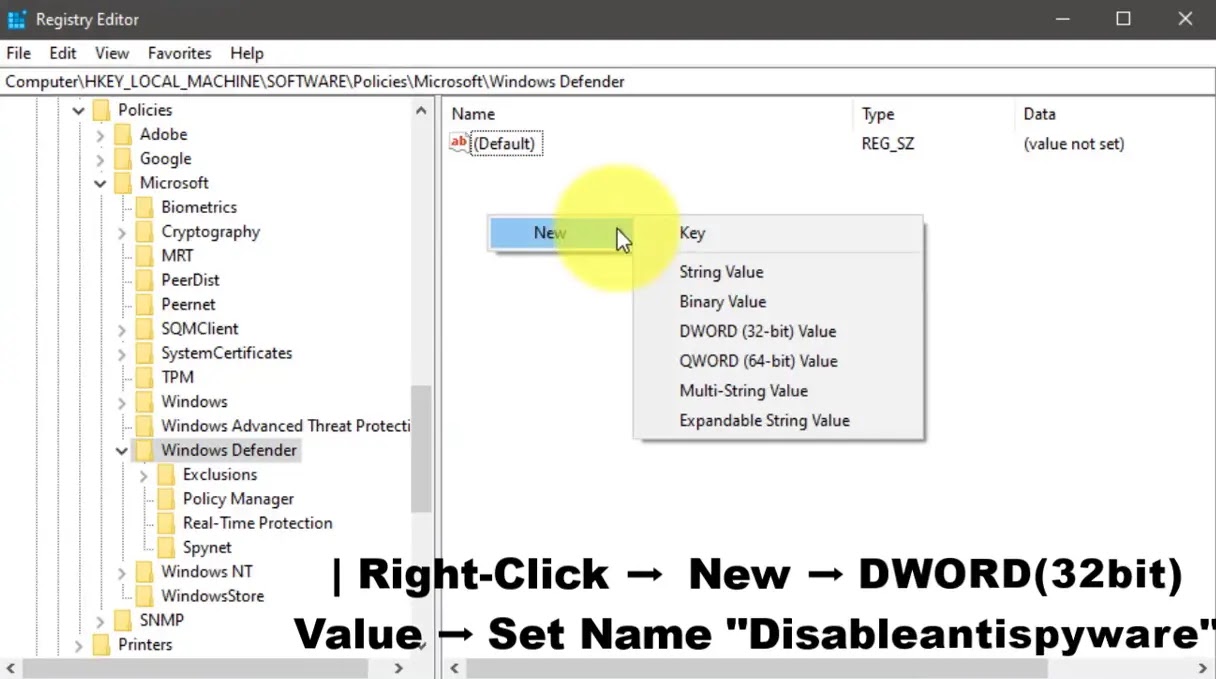
03. Right-Click The Value Layout ➡ New ➡ DWORD (32-bit) Value
04. Name “DisableAntiSpyware”
05. Set Value as 0 or 1
Method: Disabling Windows Defender using the Windows Registry
Disable anti-spyware
You may disable Windows Defender in the Windows Registry as well.
Basically, it is the same setting that gets written to it when you disable
the application in the Group Policy Editor.
01. Tap on the Windows key to open the Start Menu.
02. Type regedit.exe and hit enter.
03. Confirm the UAC prompt to continue.
04. Navigate to the following key:
HKEY_LOCAL_MACHINESOFTWAREPoliciesMicrosoftWindows Defender
05. If you see the preference DisableAntiSpyware on the right double-click
on it and set it to 1 to disable Windows Defender.
06. If the preference does not exist, right-click on Windows Defender and
select New ➡ Dword (32-bit) Value, and name it DisableAntiSpyware.
07. Go to HKEY_LOCAL_MACHINESOFTWAREPoliciesMicrosoftWindows
DefenderReal-Time Protection.
08. Right-click on Real-Time Protection and select New ➡ Dword (32-bit)
Value, and name it DisableRealtimeMonitoring.

09. Set the value to 1.
To restore Windows Defender at a later point in time, delete the key or
set its value to 0

DisableAntiSpyware REG_DWORD

